4 Finger Settings in Free Fire – Full Guide
Free Fire is a fast-paced mobile battle royale game that drops 50 players onto an island to find weapons and supplies to be the last person standing. As the safe zone shrinks, players are pushed closer together, leading to more intense battles. Vehicles help players move quickly across the map but can also reveal their location. The best way to rank up in Free Fire is through strategy, smart looting, and teamwork, especially in squad mode.
Customizing controls in Free Fire is very important. The game’s custom controls allow players to move, aim, and shoot faster and more accurately. Each player has a unique play style, and custom button layouts help adjust the controls to fit their needs. This makes the game easier and more fun to play.
Custom controls also improve reaction time and allow quick actions like jumping or switching weapons, giving players an edge over those using the default layout. Many pro players use a 3-finger or 4-finger claw grip for competitive matches. Customizing controls can take your gameplay to the next level.
What are the 4 Finger Settings in Free Fire?
The 4-finger claw setup in Free Fire lets players use both index and middle fingers on each hand. It is a popular choice for pro players because it allows faster reaction time, better control, and more advanced movements. This setup makes it possible to shoot, aim, move, and jump at the same time, leading to smoother and more efficient gameplay. You can also use this setup while playing FF Advance Server.
You should follow our suggested finger placement. Use your right index finger for shooting and aiming, and your left index finger for the scope, gloo wall, or any quick action. Use your middle finger to move, jump, or crouch.
To get started, hold your phone in a way that lets your fingers rest naturally in a ready position while staying comfortable with a full range of motion. Next, adjust your button layout to match your hand size or play style.
Turn on the gyroscope for more accurate aiming. If your fingers slip, try using finger sleeves for a better grip. Finally, practice regularly until you feel comfortable with this setup. Over time, the 4-finger claw can greatly improve your Free Fire skills.
Why Use the 4-Finger Claw Setup?
The 4-finger claw style in Free Fire is a popular control method that uses both index and middle fingers. This style lets players aim, shoot, jump, and crouch at the same time, which improves speed and gameplay flow.
With the 4-finger claw setup, players can move and shoot at the same time, jump while aiming, or crouch and shoot quickly. This gives them a big advantage in close fights. It also improves aiming and accuracy because each finger is used for a different task. This leads to faster reflexes and smoother gameplay.
The control layout can be changed to fit your hand size and play style, making it more comfortable for long gaming sessions. Many pro players and YouTubers recommend the 4-finger claw setup for improving competitive skills.
If you want better responsiveness, faster reactions, and greater accuracy while shooting, try the 4-finger claw setup in Free Fire.
Ideal 4-Finger Layout Setup
There is no single 4-finger control setup that works for everyone. The best setup depends on your comfort level and the size of your phone. However, here is a basic layout to help you get started. Use your left thumb to move your character, and your right thumb to aim and look around. Your left index finger can handle jumping, crouching, or going prone, while your right index finger is used for shooting, reloading, or switching weapons. This layout can give you better control and help you react faster during intense battles.
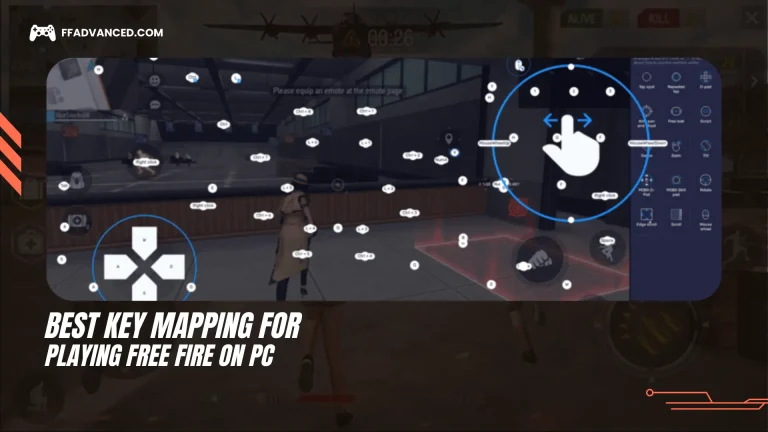
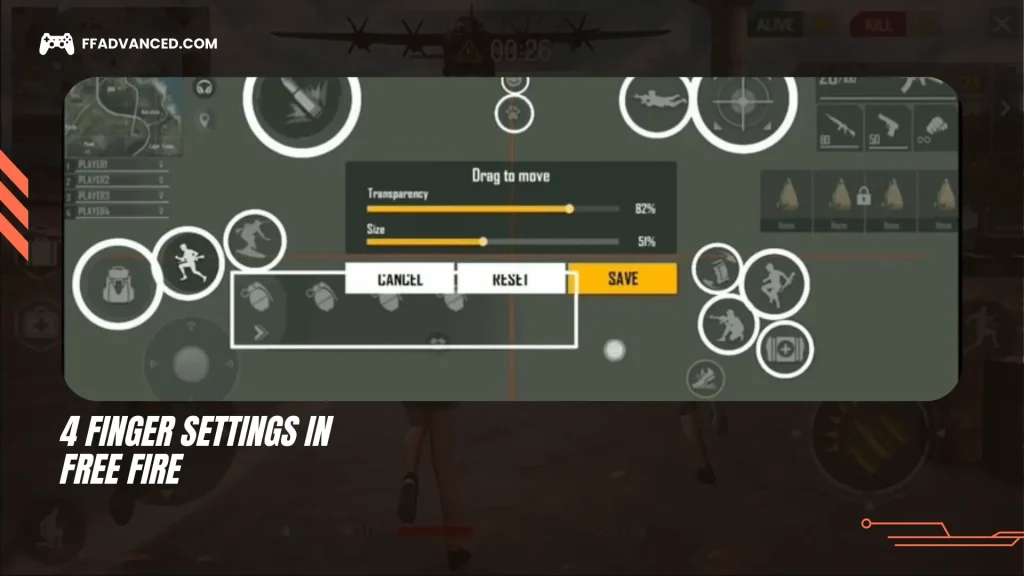
To set this up, go to the Custom HUD in the game’s settings and drag the buttons to different spots on the screen. Make sure all the important buttons are easy to reach with your fingers and spaced out enough to avoid overlap or confusion.
Adjust the size and transparency of the buttons. This helps keep the screen less crowded, reduces distractions, and makes it easier to focus on your finger movements while still reacting quickly to what happens in the game.
Step-by-Step Guide to Set Up 4 Finger Controls
If you are new to the 4-finger claw setup, follow these simple steps:
- Launch Free Fire and open the settings by tapping the gear icon.
- Tap Controls and then select Custom HUD to start adjusting your button layout.
- Arrange the buttons according to your play style.
- Move the fire button to the top right for your right index finger.
- Place the jump and crouch buttons at the top left for your left index finger.
- Keep the movement joystick at the bottom left for your left thumb.
- Position the aim button at the bottom right for your right thumb.
- Place any remaining buttons near your index fingers for quick access.
Tips for Mastering 4-Finger Settings
At first, switching to the 4-finger claw setup may feel awkward. Your fingers might feel stiff, or your hands may not move the way you want them to—and that’s completely normal. Like learning any new skill, it takes time. But with consistent practice, you will see a big improvement in your gameplay.
Tips to Get Better
To master the 4-finger settings, practice daily by spending time in training mode to get used to the finger movements. Don’t start with a difficult mode; begin with Clash Squad mode, which is shorter and simpler. As you become more comfortable, gradually increase your sensitivity settings to play faster. Record your gameplay so you can watch the videos, see where you played smart, and identify mistakes to improve on them.
Common Mistakes to Avoid
When configuring your 4-finger controls in Free Fire, avoid these common mistakes:
- Don’t overcrowd one part of the screen, as it can cause accidental touches and confusion.
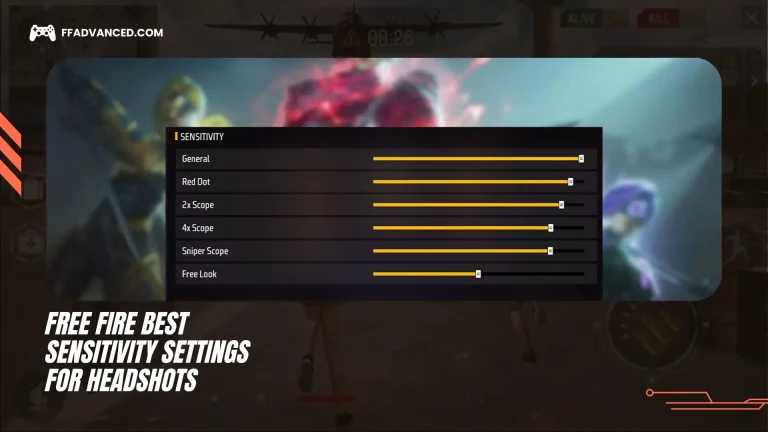
- The sensitivity settings for 2-finger controls may not work well for 4-finger gameplay, so adjust them as needed.
- Switching from 2 fingers to 4 fingers takes time, and rushing the process will only frustrate you.
- Avoid giving too many actions to a single finger. Spread the tasks evenly for better control.
Benefits of Using 4 Fingers in Competitive Play
Once you get used to the 4-finger layout, your overall gameplay will significantly improve. Many professional Free Fire players use 3 or 4 fingers to maintain control during fast-paced fights. Here are some benefits of using 4 fingers in competitive play:
- You can easily change weapons or use medkits during intense fights.
- You can move while aiming, making it harder for enemies to hit you.
- You can execute jump-shoot moves effectively, like many top players.
- You can move the camera while doing other actions to stay aware of your surroundings.
Read More On Free Fire
- How Many Servers Are There in Free Fire?
- Free Fire Tips and Tricks to Get More Headshots
- How to Get Free Fire V Badge?
Conclusion
The 4-finger claw setup in Free Fire is very popular and can greatly improve your gameplay. It helps you react faster, aim better, and control your movements more easily. Switching from a 2-finger setup can feel challenging at first, but the results are worth it.
You can benefit from customizing your HUD, adjusting your sensitivity, and practicing regularly with this setup. With enough practice and dedication, you will be able to move, aim, and shoot at the same time like a pro. Over time, this setup can help you climb the ranks and stand out in competitive matches.